So in my last post, I talked a little bit about the different miniatures ranges you can use to build the heroes, minions and monsters you’ll need for your games of DEMIGOD. This week we’re going to take a look at the different quests included in the DEMIGOD core rulebook and how you can build some truly awesome terrain for each one.
The Minotaur’s Maze
Of the six core quests in the DEMIGOD rulebook, this is probably the most challenging one to build terrain for, solely because a 3’x3’ maze is such a pain in the behind to build. When it came time for me to build mine, I did it two separate ways. You can build or buy your own blocks and assemble the maze by hand, or print/buy maze sections and assemble the maze that way. If you want build your own blocks, Black Magic Craft makes an excellent video on making your own out of XPS foam. Alternatively, you can buy appropriately-sized bricks from a variety of Etsy sellers - I used Gravik out of Ukraine.
When it comes to printing or buying maze sections, there are a couple options. EnderToys makes a series of click-together dungeon tiles that would let you get a maze together rather easily. While they do come together quickly, their main disadvantage is that they limit you to using only 28mm-scale models - the walls are too small for anything else.
As for printed options, I initially used these miniature modular stone walls by QT_studio over on Cults3D. They have the advantage of being rather large sections of wall (the long sections are 1/16th of an inch shy of 4 inches long). However, because they’re not exactly 4” long, the missing 1/16th of an inch really adds up when you’ve got a three-foot long section you’re gluing together.
The Garden of Statues
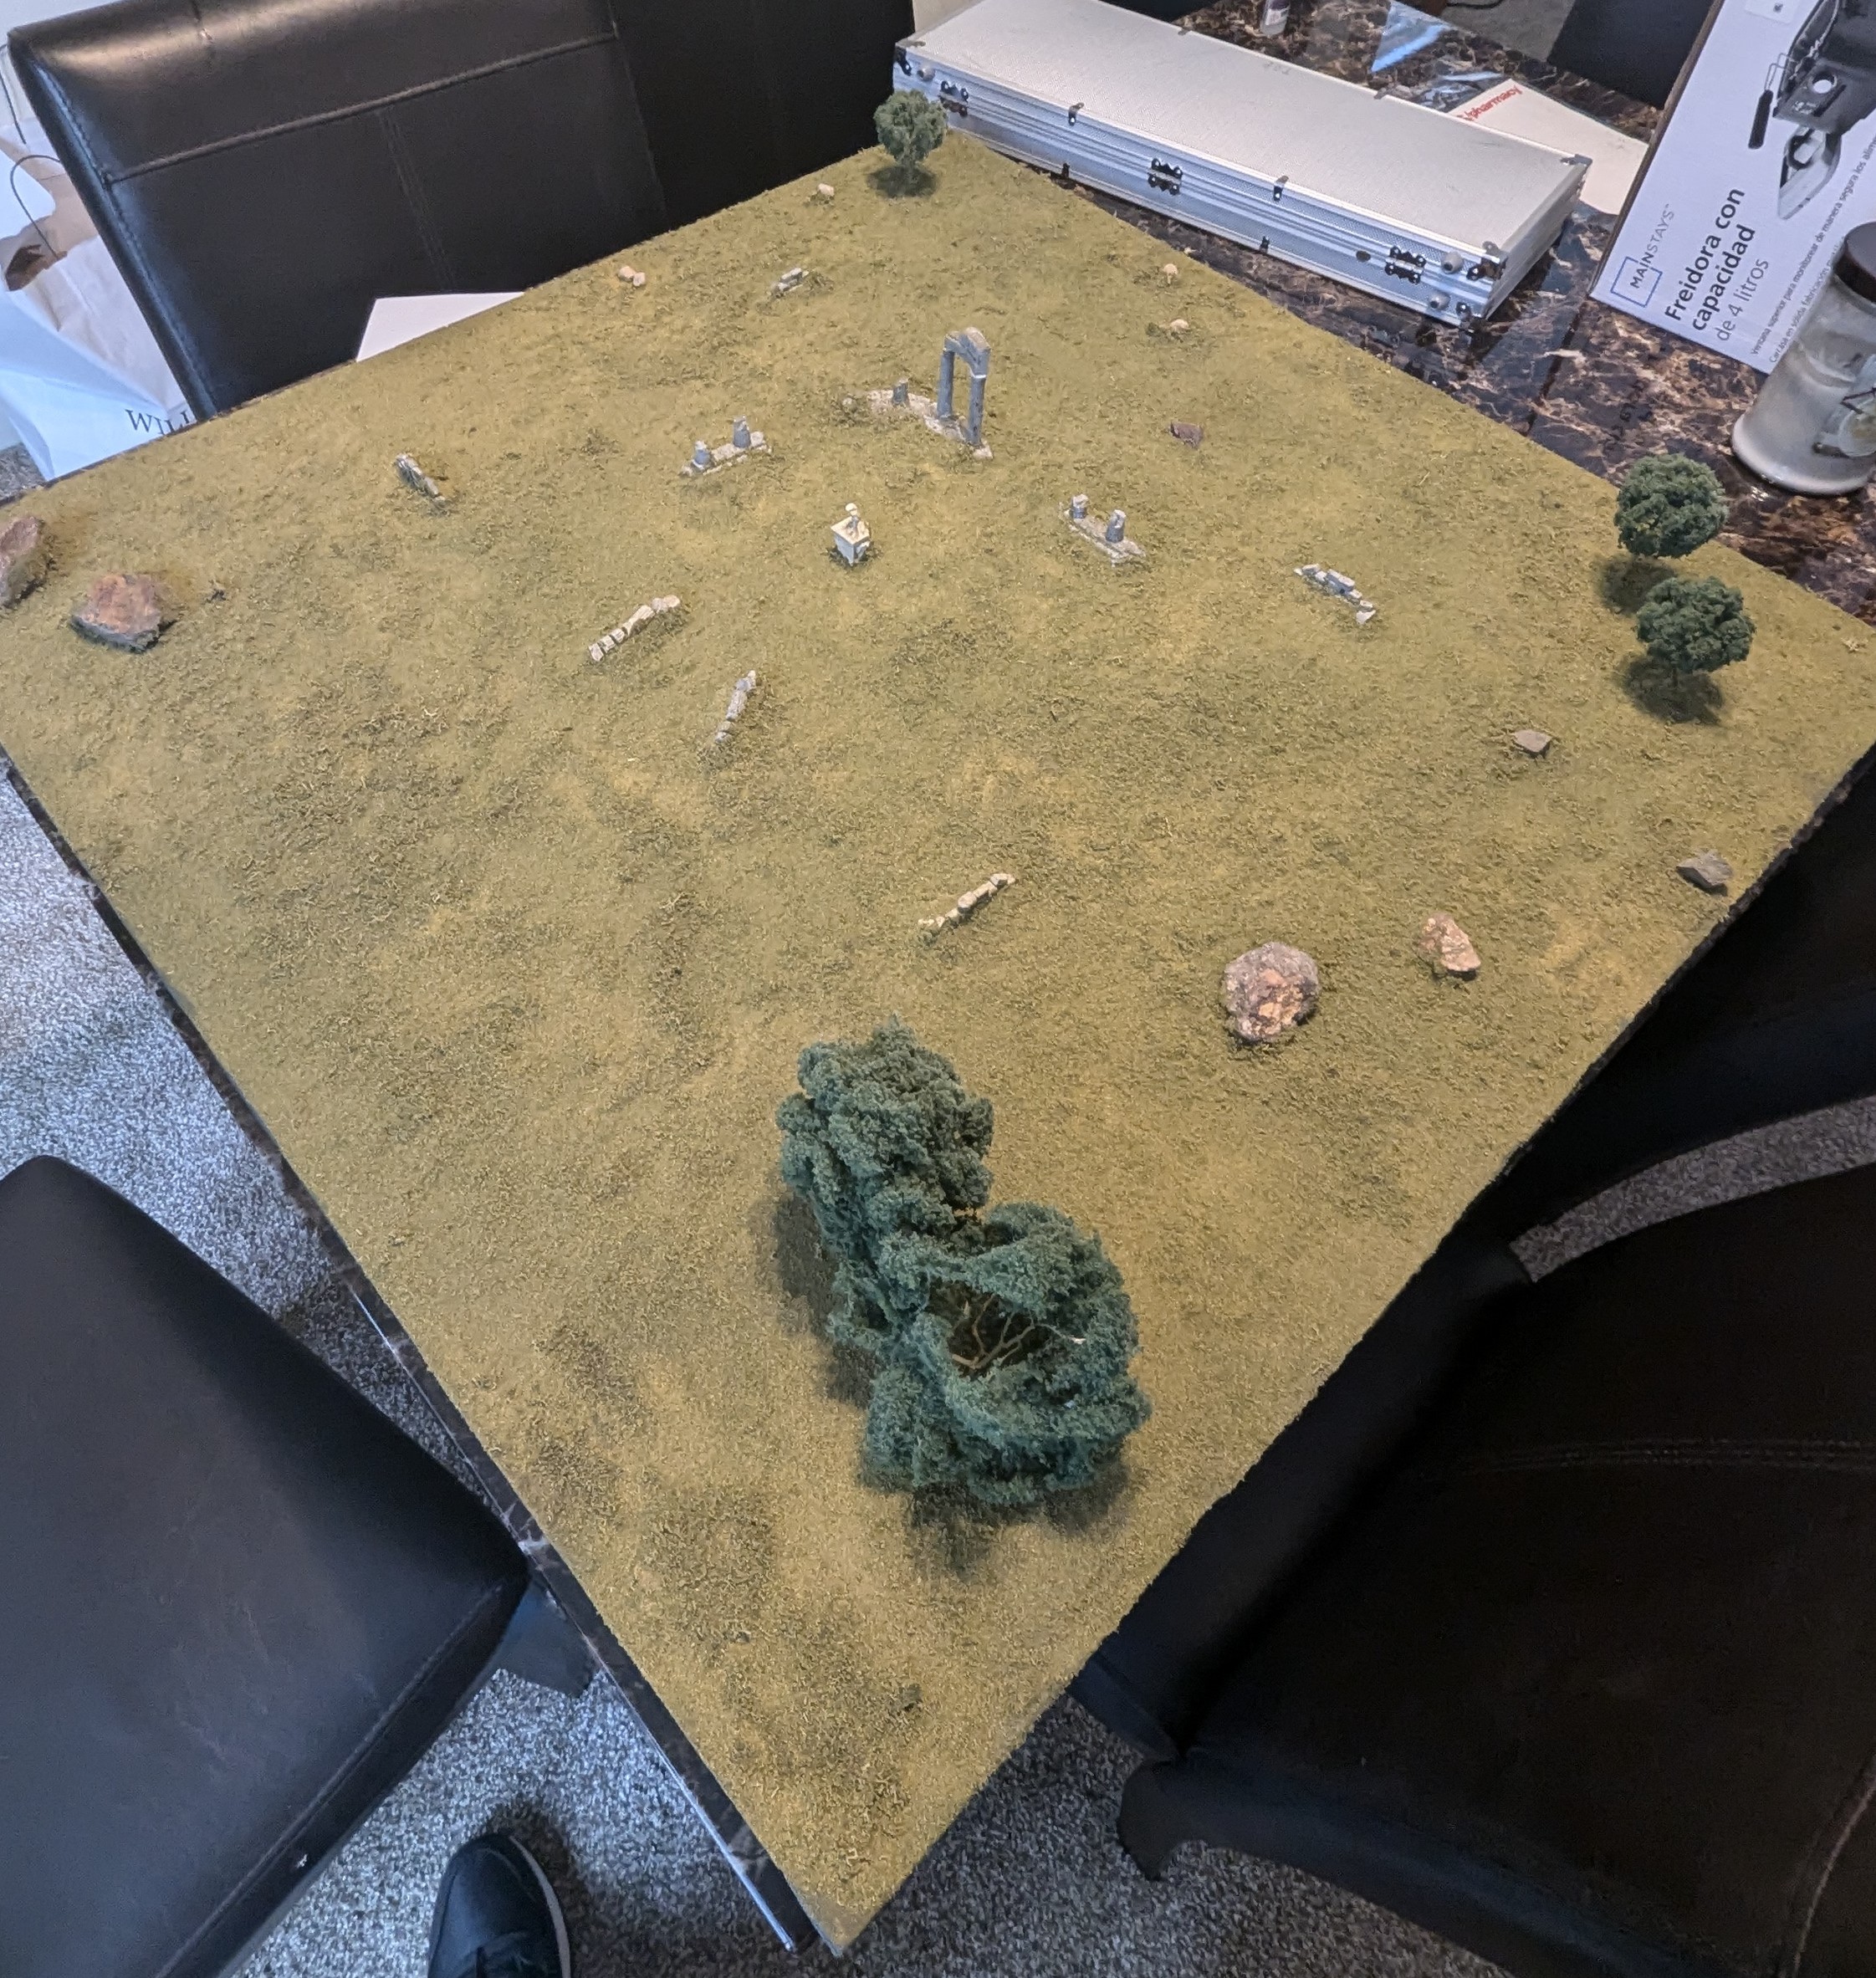
I’ll be honest and say that the board I built for The Garden of Statues (which I took to Fall In 2024) is the only board I’ve actually built for DEMIGOD. It’s not the best representation of what a DEMIGOD board could be, and there’s a lot I could do better to make it look more like what a DEMIGOD board should look like.

So what would I do differently?
The first thing is that I would have a larger temple setup as a centerpiece. The few ruined columns I have don’t make nearly enough of a good center area. I’d recommend something like the Sarissa Precision temple or the Tartarus Unchained Temple of Athena by Gadgetworks.
Once I had the center temple built, I would add some subsidiary buildings such as a fountain or animal enclosure. If you want to get some fountains for your own board, Sarissa Precision makes a set of fountains perfect for 28mm. Or you can use the Kobold’s Craft video below to build your own.
Typically, Greek temple buildings sat inside of a larger area called a temenos, which was demarcated by a dry-stone wall called a peribolos. There exist a number of rollers to make your own stone walls out of XPS foam, but I’ve found that the most realistic way is to get a bag of pea-gravel from Home Depot or the like and start gluing. Once the stone wall is completed, add some olive trees around the outskirts.
If you want to see step-by-step how this new board will look, tune in next week!
The Island of the Cyclops
For the island of the Cyclops, you’ll need to cut an island from a large enough block of XPS foam, then attach it to your board. Once it’s attached, flock it with some sand and then paint the surrounding area ocean colors - blues, greens and blacks. If you want some inspiration for island colors, you’d do good to Google the Cyclopean Islands - they’re the islands off the coast of Sicily that Homer based Odysseus’s encounter with Polyphemus on. If you want a more hands-on tutorial, Play On Tabletop over on YouTube has a great tutorial wherein he builds a board to replicate Scarif from the Star Wars universe: all of these techniques can be transferred to your Island of the Cyclops board.
The Boar Hunt
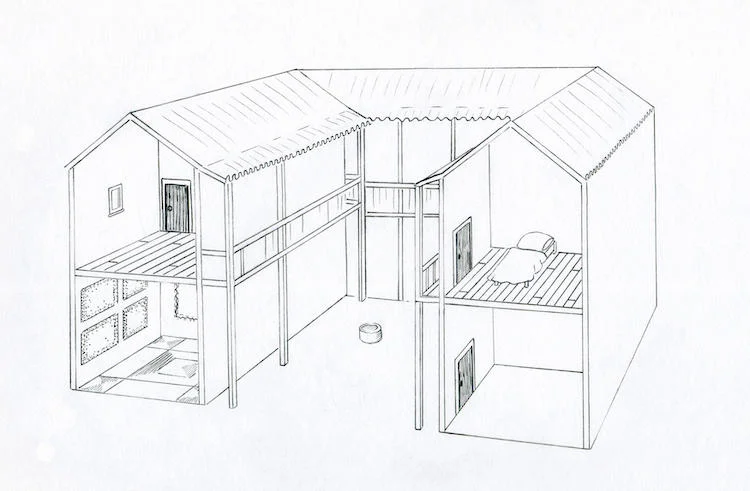
The board for “The Boar Hunt” is a little more free-form, described only as “a destroyed Greek town”. But what does that look like in practice? You’ll want a lot of broken columns, a destroyed temple or two, amd maybe some broken sections of road. Ancient Greek dwellings varied: depending on the wealth of your citizens, houses could range from two to twelve rooms, with those rooms split between multiple levels. Many dwellings had a central courtyard. An example layout is below.

One or two of these, suitably ruined and combined with some other scatter terrain (such as this set) should stand you in good stead.
The Colchian Fleece
The layout for the Colchian Fleece is a pretty simple one. Multiple groves of trees (olive or otherwise) ring a central tree upon which hangs the fleece itself. You can get 28mm trees from a number of vendors, or make your own using a metal armature and some different kinds of flock. As for an actual Colchian Fleece model, I quite like this one by Steve Barber Models, just because it looks like a proper centerpiece.
The Centauromachy
A board for the Centauromachy quest is a little unique. Why? See that Athenian house lineart further up the post? The quest takes place entirely inside the central courtyard of a really, really big Greek house. So think fountains, trees, stuff like that. Essentially, you don’t really have a “centerpiece” here - you have a lot of smaller terrain pieces that impede player movement, but there’s not necessarily one terrain feature that unifies the whole board. If you wanted to, you could build your own Greek palace and put it off to one side of the board, letting the courtyard sprawl out from the interior and across the rest of the board.
So that’s how to build boards for the different quests you’ll encounter in the DEMIGOD core rulebook. If you’ve got any Qs about building your own board, feel free to shoot me an email at chris@no-name-games.com.


